Tuesday, May 5, 2020

Making of ...Mew Berry ♡

This cute girl under here shares DNA with a bunny and a cat. She is also from the first manga I ever fell in love with. And we share the same birthday! Considering all of these facts, It was inevitable for me to cosplay her at some point.
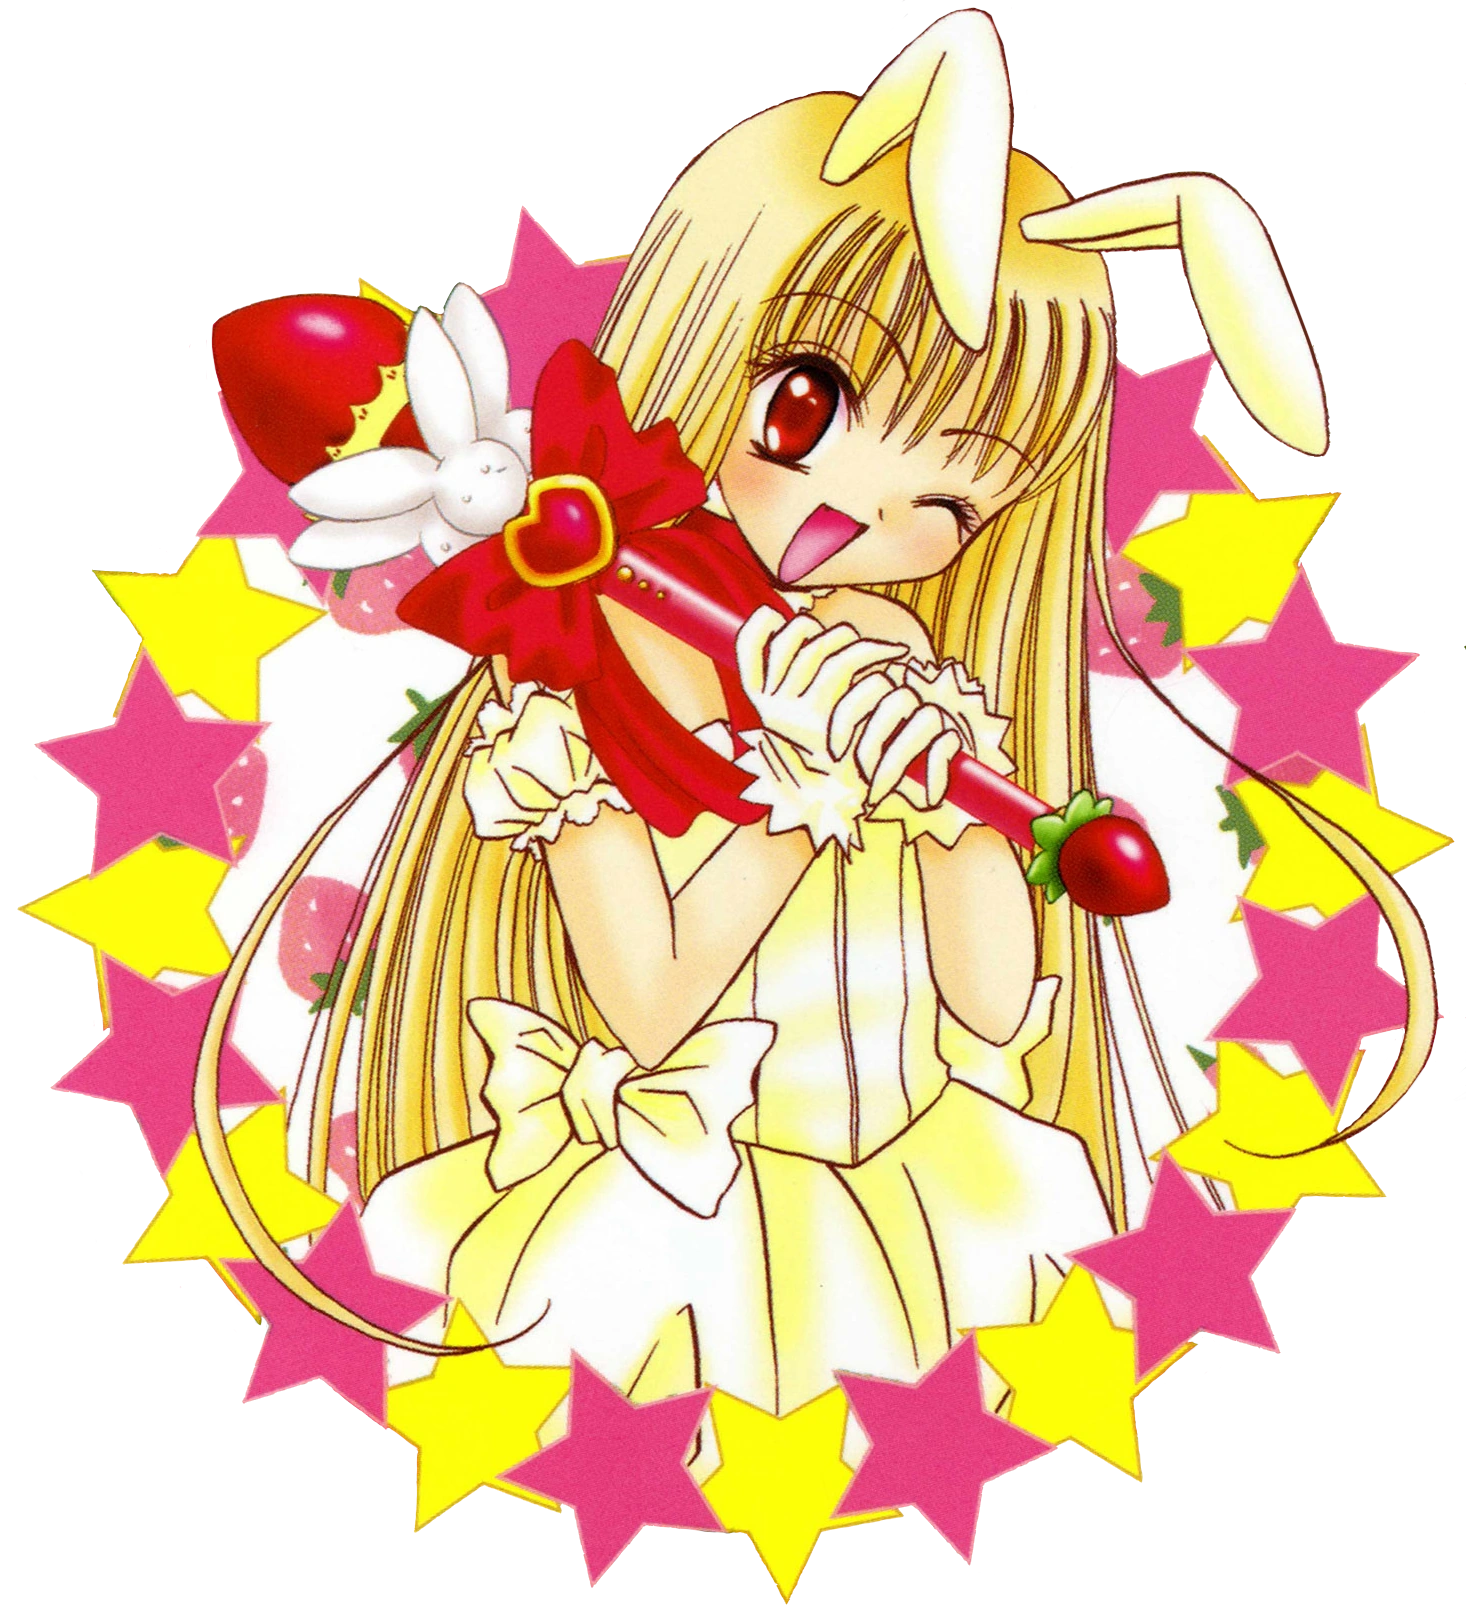

Isn't she cute?
I made this cosplay almost entirely from materials I already had. The fashion fabric used to be curtains in my sisters wedding, red ribbon I had purchased ages ago for Asunas costume and I had got the beautiful fur fabric from my grandma as well as the zippers I used. I keep a pile of laces, ribbons interfacing, boning etc. just in case I happen to need them (because I often do). The poofiness of the bottom is thanks to my old organza curtains and leftover tulle.

My Doggo showing materials
Corset
I decided to make  the cosplay in two pieces, corset and bottom. That way It would be more convenient to wear. I started the cosplay with corset. I used my old corset patterns, that I slightly altered the neckline to match reference photos. The corset has three layers: Fashion fabric with fusible interfacing, interfacing with boning channels and lining. The corset is only lightly boned and has zipper on the side. The two bows on the side are attached to the bodice.


Bottom
The bottom was a little trickier to do than the corset. It started off as a shorts and ended up as half a shorts. For the shorts I used pattern I had drafted earlier. I knew the shorts would fit me perfect, so it was an easy start.


My Doggo in front of shorts patterns

I wanted the bottom to be extra poofy, so I did a little research on how to make a petticoat.
I found this video and I highly recommend to watch it! It has exact measurements for the petticoat and the instructions are great!
A lot of pieces to make a beautiful poofy petticoat

petticoat in the making

finished petticoat.. it will be hidden forever under the fashion layer..
 Next step was to put everything together, attach the zipper and waistband. It looks like a huge blob.
A blob of shorts, petticoat and fashion layer together.
puffy sleeves
I made the sleeves using two rectangular pieces. The smaller one was slightly wider than the arm measurement and the exact lenght I wanted the finished armband to be (+ seam allowances). The bigger rectangle that was around 1,5 times the width and approximately 4-5 cm longer. For the smaller piece i attached fusible interfacing and whip stitched the lace on as shown in the picture. The longer piece was gathered to match the smaller piece. Then I saw the rectangles together right sides facing each other and finished the seams with inter locker. I then attached elastic band to the seams with zig zag stitch and finished the armbands with a little hand stitching to make it a donut shaped.


Pieces needed for the armband (I ended up making he pieces a little bit smaller)

ears, gloves and shoes
The ears were super simple to make. I drafted pattern, cut the fabric, sew the sides together, put wire to the ears, and the attached them to the headband.


The gloves were the only part I had to purchase a new material. The fashion layer I used didn't stretch at all and because of that I knew the gloves would end up horrible if I made them using the same fabric. I made the gloves by simply tracing my hand on the fabric and adding triangles to match the reference photos. The I sew along the lines, cut as close to the sewn line as possible and finished the ends with additional triangle parts that had some fusible interfacing.

I had bought pair of boots from thrift store ages ago, and they happened to be perfect for Berry. I just needed to do boot covers. I made the patterns and sew the covers.

mew berry rod
I made mew Berrys weapon from insulation board, worbla and wooden stick (that was from plunger XD). I first shaped the insulation foam to match the shape I wanted, sanded it, covered in worbla, added woo filler, sanded, primed it with gesso and finally painted it.


Tower of insulation foam starting to get a shape
All insulation foam pieces ready for worbla
The heart shapes were also made from worbla
Wood filler added, waiting for it to dry and sad little bunnies without eyes :(
And here's how everything turned out! 
The bell was made from Christmas ornament

Wand and gloves!


Friday, November 22, 2019

Suigintou - Making a dream cosplay


Suigintou has been on my to-do list quite some time. I knew I wanted to cosplay her as soon as I saw her. I loved her costume and I loved her personality. Unfortunately she had to wait her moment to shine for a loooong time. But now let's get to the process of making suigintou!

Did her costume according to the older design

My fabric of choice was velvet. I wanted to make it from navy velvet, but unfortunately I wasn't able to find it, so I had to go with black. Still a bit salty about this. Patterns for the costume were easy to make, except for the sleeves. I struggled a lot with those, because I wanted to make them perfect. I changed the pattern multiple times during the process, and in the end I think I got the result I wanted. There are three different parts for the costume: top, bottom and underskirt. Also there is hoop skirt with tulle overlay and the wings can be taken off. The costume is fully lined.

All the materials.

Patterns ready to be cut.

Top. There is a zipper on the back of the costume. I really should have put the zipper on the side, so that I could have sew the wings on the costume and not have to do the lacing on the back every time I put on the costume. But at least now The long wig will hide the zipper completely. The decorative edge on the neckline of the costume is made with round satin ribbon. It took a lot of measuring to make it look nice.
prototype of the costume.

I fought a lot with these sleeves, but in the end I won!
 Bottom. I wanted to have a dimension on the flappety flaps, so they each have 4 darts. To make the flappetyflaps stay nicely on their place there is wire on the lacing. Two of the flappety flaps had upside down crosses on them and I made them embroiding iridescent white thread instead of just painting them on. I think it adds nice touch to the costume.

flappety flaps and top in the making

trying it on

making the crosses
underskirt. The underskirt was simple to make. It is a rectangle with gathered longer rectangle on the bottom. There is an elastic waistband.
Getting there...
 Accessories and shoes. The headdress is roundish shape with rose on the middle. There is also ribbon and the edges are made with round satin ribbon. It stays on with alligator clips.
 I used the same shoes I had in the Iteza gogo kuji don't be late Sheryl. I added some decorations, that can be taken off, so I can use the same shoes for two costumes.

wings were made from wire, fabric and bunch of rooster feathers. I might redo the wings some day and make them bigger and change the shape a little.
Basic shape for the wings.

Feathers added to both sides

Trying those wings on.


All the pieces done, now let's put it on
And here's the finished results. This costume is so hard to photograph since it has black and white.


Thursday, November 21, 2019

Asuna Yuuki - School uniform


I have never in my 10 years of cosplaying done school uniform, so it was about time to make one. This was quick and easy cosplay to make. And for the first time I used ready-made pattern (though I had to alter them a bit).  I was debating whether I should make the winter version or the summer version. I ended up making kind of both: I made the shirt according the summer uniform and jacket according to winter uniform. The winter uniform has long sleeved shirt underneath so, it isn't 100% match with short sleeved shirt, but it's good enough for me.

I had already most of the fabrics and other accessories needed to finish this costume. I only had to buy zipper and fashion fabric for the skirt and jacket. The jacket and skirt are cotton with polyester lining. The material of the shirt is most likely polyester, but because I used old fabric I had, I can't say for sure.


materials for the jacket and skirt
jacket. The jacket was easy to make. I added interfacing to the collar, sewed all the pieces together added satin ribbon details and added interfacing. Then all there was left to do was to make buttonholes and sew buttons and the jacket was done.

Here's how the cut pieces of fashion fabric looked like

Ironing side seams 

Jacket without sleeves and lining
sleeves need stripes
Lining pieces for the jacket
Finished jacket with the shirt.

skirt. I made the patterns for the skirt myself. The skirt is fully lined. The skirt is basically made out of many rectangles. There is a zipper on the size and the buttons on the front are just for decoration.
skirt pieces
shirt. For the shirt I had pattern, so I saved myself from making those. The fabric I used was quite sheer, so I used two layers of fabric for the upper front and back pieces. I had barely enough of fabric, so I made the shirt about 5 cm shorter than I would have otherwise.
There was interfacing added to the collar and couple of decoration ribbons. At this point the collar looked like a Finnish flag.

almost finished shirt
badge. I made two badges, one for the jacket and one for the shirt. I used suede fabric that I painted gold and embroided the gold bird looking details. I think that these badges ended up looking great!


Finished badge to be sewn on the jacket


And here's how the finished outfit looked. I still haven't had proper photoshoot for the costume, so please excuse the quality of the photos.